Friday, 28 November 2008

final finished project ymca house


I created a box for 4 walls and added "brick" material. The windows were created and duplicated from the boxes. The ground floor and stairs were again created from a box. Wooden floor were added. The roof was created by using vertex to pull the roof up and added tiles which were from the internet.

The pavement and road were created by using boxes. I added the colour grey for the pavement.

The sky were created from the plane and added stars from the internet.

The light were simply added by usig the cylinder and added lights from omni and duplicate it for the other side of the house.

The lights were added so it is bright and easy to see for the audience.
The final scene: An animation of me, Sean and Martin waving to the audience before entering the YMCA building.


animation testing....

Wednesday, 26 November 2008

final finished face project


after handling I have created two faces with different effect to see which one is best for next stage- t-shirt, jean and trainers for the final scene.

Tuesday, 25 November 2008

final finished bedroom project

board


I created a box and duplicated it, scaled it down and cut by using Bollean and added the material – pine for the frame. I created another box and added green material for the background. 9 planes were created and scanned leaflets/photos from YMCA via Internet and a poster from Sean.


Animation testing.....

created lighting and lamp

LAMP


I learned this step by step from http://www.3dtotal.com/. Just added the material.

LIGHT


I created a long cylinder then extrude it large enough for the bulb to go in there.

I then created line and lathe for bulb.

I then created a cylinder and duplicated it. I removed the top so created a hollow cylinder for the light to show through.

I also designed a different shape as above but preferred the cylinder.

Monday, 24 November 2008

creat a bed


Added bed in bedroom


I created a box then duplicated another box for the mattress. The third box is for a pillow, I then applied the edit ploy –Ploygon. I created the “pillow box” to make it look like someone slept on it.
The last box was created for cover. This is a bit difficult because I tried to make it look realistic but hadn’t succeeded yet. I left it for the moment as I did not want to make it worst!!!

created poster, small and big cupboard

BEDROOM CONTINUE…


Added things for the bedroom.

POSTERS


I created a plane then surf the internet for the best poster then saved it. I opened the bitmap and applied it on the plane. This was repeats a couple of times.


CUPBOARD


Two boxes were created, cut (Boolean) a hollow for two doors for and 4 drawers.
I added boxes for the four drawers and again I hollowed them .
The last two thin boxes are for the doors. Created a cylinder then modified it to bend for the handles which were duplicated five times.
Beach Wood was used for the material.

SMALL CUPBOARD


Two boxes were created, an extra thin box for the door. A sphere for the handle and added beach wood material to it.

Thursday, 20 November 2008

created dvd sleve


Added things for the bedroom


I created 3 boxes and hollowed them to make it look like shelves and added beach wood material.

For the DVD, I surf the net for images and came up with Indiana Jones. I saved it and opened the Bitmap, filed the image and clicked the picture to create DVD from the plane.

Wednesday, 19 November 2008

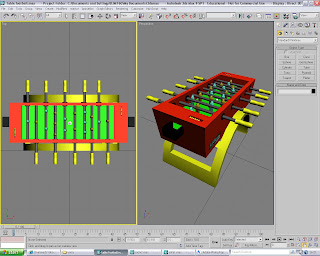
created table football

FOOTBALL TABLE

Firstly, I’ve done some research on the Internet for football table. The image looked dull and old fashion. I decided to create my own which would be modern, bright and exciting!


BOX
A box was created and duplicated it then scaled it down. I used the Boolean to cut the inside out. To do this, I’d right-click-convert edit ploy-vertex click the box pull to angle. I created a small circle (cylinder) 5 times on side of the table for the poles to go through. This was repeated for the other side.
I decided to use the colour red for this table.


STAND
A big circle was created (cylinder) then copied to scale down and draw width and cut (Boolean). Then create a box in the centre of the circle (cylinder) to cut then create box (rectangle) on the top half and middle of cylinder (Boolean).
The colour yellow was used for the stand.
POLES/HANDLES
I created a long thin cylinder and a wider one for the handles which were copied nine times. I applied grey and yellow for the poles/handles.

MODELS

The models were then added. The two teams have got different colours.


GOALS

The green goals were created by using small boxes and hollowed them.
I used a sphere for the ball.

It took me two days to finish this because numerous of changed were made. There were a few mistakes and a lot of thinking involved.
The Football Table was a challenge and had to overcome a few things with the animation.


Created omni and shadow


Animation

Tuesday, 18 November 2008

created flat screen tv


I opened merge file and added the TV, scaled it down so it can sit nicely on top of the TV stand.


I created two boxed, one for the edge and one for inside to make it look like a 3D TV. For the screen, I cut (Boolean) then right-click/convert to editable ploy- click edge for both boxes and extrude pull down then click bevel then extrude.


created TV unit

TV STAND


I opened the file called "Room", then I filed/merge file/ click TV unit and applied ok to scale down the TV to fit inside the room.


I created a box then copied one and scaled it down. I copied it and compound object/ Boolean/click the large object and picked operand B.
I created the cylinder and repeated the same procedures as followed:
Compound object/Boolean/clicked the larger one then click pick operand B- click two small ones.

I then added the material from the internet and applied beach wood to the object. I found this easy to create and happy with the outcome.

created sofa


open file "Room" then click file and merge file - click all -ok then scale down to fit in room


I created the chamber box then scaled it down followed by clicking the “compound” object and clicked “Boolean” clicked the larger one and then click pick operation B clicked on the small one.

Created chamber box again then duplicated them 4 times, two for the back and two for us to seat on. I ensured that both are the right match.

I done some research on the internet for fabric and found one I liked saved it then created the material by clicking bitmap and applied the material on the sofa.

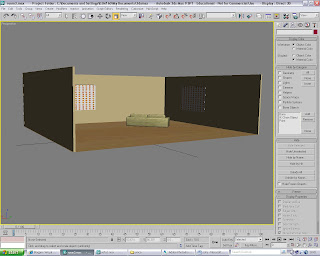
created a Room

CURTAINS


3)


plane L=200, w= 60, length seg=10. width seg=21 - then created cylinder R=1, length 160

Checked internet for Manchester United logo, saved it then open Photoshop-file-place and applied it 5 times then saved it to 3D max and clicked material editor/bitmap and okayed it, then opened file and simply applied the material to curtain.


WINDOW


2)

Created box for window and applied 3 squared in side this to make it look like a window.
Clicked compound object- Boolean- click the box-pick operand B.

ROOM


1)


Created a box for 3 side wall and another created box for the floor. Applied material/colours and wood affect.

At the moment this part of the project is difficult to start and I hoped to finish this room by next week if I can!!!!


DECORATION


I thought this room looked cool but later realised that there’s too much going on. I decided to start again and make this room look simple and feel relaxed.


Monday, 10 November 2008

test for create body


I tried two different bodies by creating a cylinder and a box. I am comparing the two and see which are the best for the next animation.

I used the editable poly- use for extruding/moving/scaling/symmetry and turbo smooth modifiers.

I was able to achieve this. I will finish my face project before adding it to my body.

I realised my arms are long which made me laugh!! I will change this later. At moment, I am playing with it!